


")


")


If you know me, you know I have a great fondness for jam, jelly, and marmalade.
It actually kind of borders on a problem.
If you’ve been at The Mouse House late at night, you may have seen me sneaking a spoonful or two of jam after midnight. If you catch me, I’ll probably claim that I desperately need fortification for some kind of late-night, top-secret adventure, then promptly shoo you away.
Call it Paddington Bear Syndrome. I just can’t help it. (You know that whole thing where a spoonful of local honey is supposed to help your allergies? I’m all over that, too…)
So when I saw this recipe in a recent issue of Cooking Light, I knew I had to try it. I mean, homemade baked jelly doughnuts? Right up my alley.
What are soufganiyot?
Soufganiyot are Israeli jelly doughnuts, and are typically eaten around Hanukkah. They’re traditionally fried, but Cooking Light skinnied them down by baking them instead.

In reality, the baked version is more like a jelly-filled sweet roll than a typical fried doughnut.

Regardless, these little beasties make an absolutely fabulous JDS (jam delivery system).
Seriously. We Couldn’t. Stop. Eating. Them.

The dough is soft, light and ridiculously fragrant with fresh orange rind.

Two fillings
The filling, of course, is what you make it. The better the jam, the better the filling, so use your favorite.
I stuffed half of mine with homemade, whipped chocolate ganache as an experiment. They were unbelievably good. There’s something about the combination of orange + chocolate that’s just so delightful.
Here’s how to make them, step by step.
Baked Jelly Doughnuts
Doughnuts
1 1/2 tsp. dry yeast
3/4 cup warm milk
6 Tbls. sugar
1 Tbls. olive oil
1 Tbls. grated orange rind
1/2 tsp. vanilla extract
1/2 tsp. kosher salt
1Â large egg
3 1/4 cups flour
3/4 cup seedless raspberry jam
1 Tbls. confectioner’s sugar (for garnish, if you like)
Chocolate Ganache Filling
3/4 cup heavy cream
1 cup semi-sweet chocolate chips
Makes 16 doughnuts
Proof the yeast
Now, I’ve had people in the past give me grief about doing this. “It’s a wasted step!” they cry.
It’s not. And I’ll tell you why.
Yeast is alive. And because it’s alive, it also has the chance to be (you guessed it) dead.
Proofing yeast (a.k.a. mixing it up with warm liquid and sometimes a little sugar) tests to make sure that it’s alive and kicking—which means that it’s ready and able to give your dough plenty of poof. It also gives the little critters a head start to get working.
If you skip this step and your yeast is dead (or more likely, you killed it by adding water/milk that’s too hot), you won’t find out until you add all the rest of your ingredients, and then wait in vain for about an hour for your dough to rise. (Talk about a waste!)
It only takes 10 minutes. Take the time to do it.
So! Grab your yeast. I keep mine in a mason jar in the freezer.

Put it in the bowl of your mixer, or a large mixing bowl if you’re mixing by hand. Heat the milk up in the microwave or gently over low heat on the stove. Pour it over the yeast. (In terms of temperature, if it were water, you’d want it to be warm enough to wash your hands, but not hot enough to make a cup of tea.)

Whisk it up and let it sit for about 10 minutes.

After about 10 minutes, you should notice an opaque “raft” on the surface of the milk. This means your yeast is active and happy. (If you don’t see that, toss the mixture and try again with fresh yeast.)
Make the dough
Add the olive oil.

Toss in the sugar, grated orange rind, egg, vanilla, and salt.

Beat until well blended.

The mixture won’t be completely homogeneous. That’s just fine. Mine looked like this:

Toss in the flour.

Beat until you have a smooth, sort-of sticky dough that pulls away from the sides of the bowl.


Grab the dough and smoosh it into a relatively smooth ball with your hands.

Set it back in your mixing bowl.


The first rise
Cover with a few damp towels. Let it rise on your in a warm place for about an hour, or until the dough has doubled in size.

Make the whipped ganache
While the dough is rising, prep your fillings. If you’re going to use the ganache filling, make it first. (You can totally go the easy route and just fill the doughnuts with jam and call it a day.) It needs to cool before you whip it.

Put the cream on the stove in a small pan over low heat. Keep a close eye on it. When it just starts to bubble at the edges, yank the pan off the heat.

Put the chocolate chips in the bowl of your mixer, or a large bowl if beating by hand or with an handheld, electric beater. Pour the warm cream over the chocolate.

Let it sit for a few minutes so the chocolate can soften up.

After a few minutes, give the mixture a stir.

Stir until the mixture is uniform.

It will be thin. That’s just fine.

Let it cool to room temperature. As it cools, it will thicken a little.
When it’s room temp, beat until it thickens up. This will take maybe 10 minutes. Here’s what it looks like after a few minutes…

…and after about 10 minutes.

(Resist the urge to jump in the bowl and swim around with your mouth open.)

You want it to have soft, floppy peaks when you lift the beater out of the bowl.

When it’s done, scoop it out into a pastry bag or a gallon-sized zip top bag. Scoot all the filling down into one corner, and twist the bag to keep it there.

Prep the jam filling
Now, I used seedless raspberry jam. Use any kind you like. Remember, the better the jam, the better the filling.

Bag up the jam just like you did with the ganache.

Set those aside in the fridge for now.

Form the doughnuts
When your dough has doubled in size, transfer it to your counter or a board. It should be smooth and dry enough that it won’t stick. If it does stick, toss a little flour underneath it.

Whack it into 8 wedges using a bencher or a big, pointy knife.

Make them as even as you can, but don’t make yourself nuts.

Grab one of the wedges.

Smoosh it around so it’s a fairly even shape.

Then nip it in half, so you have 2 equal-sized pieces of dough.

Roll each piece of dough into a nice, tight little ball. Set the dough balls on a baking pan lined with parchment paper.

Repeat with the rest of the dough, until you have 16 dough balls. Be sure to arrange them so they’re not touching on the pan.

The second rise
Let them rise like this, uncovered, for about 45 minutes, or until they’ve about doubled in size. About 15 minutes before you think they’re ready, pre-heat your oven to 375 degrees.


Bake the doughnuts
When the dough has doubled in size, pop the pan into your preheated, 375-degree oven. Bake for about 14 minutes, or until lightly browned.


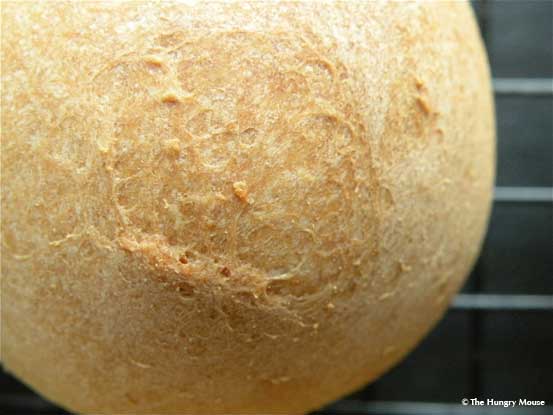
When they’re done, slide them off the pan and onto a rack to cool completely.


The bottoms will be lightly browned, like this:

Fill the doughnuts
When they’re completely cool, you’re ready to fill them. Poke a hole into the doughnut with the handle of a wooden spoon (or something about that size). Push the handle in until you almost touch the other side, but don’t punch through.

You’re basically looking to make a little door for the filling.

Repeat with all the doughnuts.

Grab your fillings. If you used a gallon-sized zip-top bag like I did (instead of a pastry bag), nip off one corner of the bag with a pair of scissors.

Insert the tip of your improvised piping bag into the hole you just made in a doughnut.

Gently squeeze the bag to fill the doughnut, pulling the bag out slowly as you squeeze. (Do a few, you’ll get the hang of it. You can kind of feel when the doughnut is full.)

Repeat with the rest of the doughnuts. I did half full of jam and half with whipped chocolate ganache.

Sprinkle with powdered sugar right before serving, if you like. Enjoy!!

Calories
Fat
Carbs
Protein

The Hungry Mouse
Yields About 16 doughnuts
Soufganiyot are Israeli jelly doughnuts, and are typically eaten around Hanukkah. The dough is soft, light and ridiculously fragrant with fresh orange rind. Here's how to bake (not fry) them, and stuff with 2 kinds of filling: jelly and chocolate.
 Save Recipe
Ingredients
Instructions
- Proof the yeast: Put it in the bowl of your mixer, or a large mixing bowl if you're mixing by hand. Heat the milk up in the microwave or gently over low heat on the stove. Pour it over the yeast. (In terms of temperature, if it were water, you'd want it to be warm enough to wash your hands, but not hot enough to make a cup of tea.) Whisk it up and let it sit for about 10 minutes. After about 10 minutes, you should notice an opaque "raft" on the surface of the milk. This means your yeast is active and happy. (If you don't see that, toss the mixture and try again with fresh yeast.)
- Add the olive oil.
- Toss in the sugar, grated orange rind, egg, vanilla, and salt.
- Beat until well blended.
- Toss in the flour. Beat until you have a smooth, sort-of sticky dough that pulls away from the sides of the bowl.
- Grab the dough and smoosh it into a relatively smooth ball with your hands.
- Set it back in your mixing bowl.
- Cover with a few damp towels. Let it rise on your in a warm place for about an hour, or until the dough has doubled in size.
- Make the whipped ganache: Put the cream on the stove in a small pan over low heat. Keep a close eye on it. When it just starts to bubble at the edges, yank the pan off the heat. Put the chocolate chips in the bowl of your mixer, or a large bowl if beating by hand or with an handheld, electric beater. Pour the warm cream over the chocolate. Let it sit for a few minutes so the chocolate can soften up. After a few minutes, give the mixture a stir until uniform. Let it cool to room temperature. As it cools, it will thicken a little. When it's room temp, beat until it thickens up. This will take maybe 10 minutes. When it's done, scoop it out into a pastry bag or a gallon-sized zip top bag. Scoot all the filling down into one corner, and twist the bag to keep it there.
- Prep the jam filling: Bag up the jam just like you did with the ganache.
- Set both fillings aside in the fridge for now.
- Form the doughnuts: When your dough has doubled in size, transfer it to your counter or a board. Whack it into 8 wedges using a bencher or a big, pointy knife. Grab one of the wedges. Smoosh it around so it's a fairly even shape. Then nip it in half, so you have 2 equal-sized pieces of dough. Roll each piece of dough into a nice, tight little ball. Set the dough balls on a baking pan lined with parchment paper. Repeat with the rest of the dough, until you have 16 dough balls. Be sure to arrange them so they're not touching on the pan.
- Let them rise like this, uncovered, for about 45 minutes, or until they've about doubled in size. About 15 minutes before you think they're ready, pre-heat your oven to 375 degrees.
- When the dough has doubled in size, pop the pan into your preheated, 375-degree oven. Bake for about 14 minutes, or until lightly browned.
- When they're done, slide them off the pan and onto a rack to cool completely.
- Fill the doughnuts: When they're completely cool, you're ready to fill them. Poke a hole into the doughnut with the handle of a wooden spoon (or something about that size). Push the handle in until you almost touch the other side, but don't punch through. You're basically looking to make a little door for the filling. Repeat with all the doughnuts. Grab your fillings. If you used a gallon-sized zip-top bag like I did (instead of a pastry bag), nip off one corner of the bag with a pair of scissors. Insert the tip of your improvised piping bag into the hole you just made in a doughnut. Gently squeeze the bag to fill the doughnut, pulling the bag out slowly as you squeeze. Repeat with the rest of the doughnuts. I did half full of jam and half with whipped chocolate ganache.
- Sprinkle with powdered sugar right before serving, if you like. Enjoy!!


")
